
In preparation for a bike tour, one of the biggest components of the planning process is researching, selecting and purchasing your gear (or kit, as the English call it). It’s an enormous undertaking, and in our team of two, the weight of these decisions was shouldered primarily by Dave (and ironically, the bulk of that weight was later carried by him in a more literal way).
However, over the course of our trip, I began to appreciate and realize the value of having good equipment for the cause. We invested more on the front end of our journey to buy higher-quality gear, and we did not regret that. Even so, not everything survives! Even the good stuff is not always capable of handling what cycle touring puts it through day in and day out.
As the Tour was coming to an end, I began mentally assessing our gear, thinking ahead to the next season when we will have income… and we’ll be able to begin replacing some of our more heavily used items. I generally created three categories into which all our things would fit:
1—Going strong, will continue to use (example: our bicycles)
2—Has seen better days, but still useable; replacement not a priority (example: our cookware)
3—Should probably be thrown away immediately (example: our cycling shorts)
So I’m going to go through as much of our gear as I can in these next few blog posts, and I’ll be classifying them into these three areas. (Now, bear in mind, we don’t have jobs yet, so actually, we haven’t thrown any of this stuff away, though maybe we should have.) This week I’ll start with biggies… some of the most critical items we purchased for our bike tour. We won’t be talking about WHY we purchased these items, as we address most of those details in the GEAR section of our web site. We want to focus on the state of these products on September 28, 2013—the day we finished our world bike tour. How did the item survive? Did it finish the journey well? Is it completely dead now? Ultimately, the question is: can we recommend it to you?
I’ll start with the bikes themselves and most of the accessories that go on them. Next week I’ll tackle camping gear, and the following week will be about our clothing. That should cover the bulk of it!
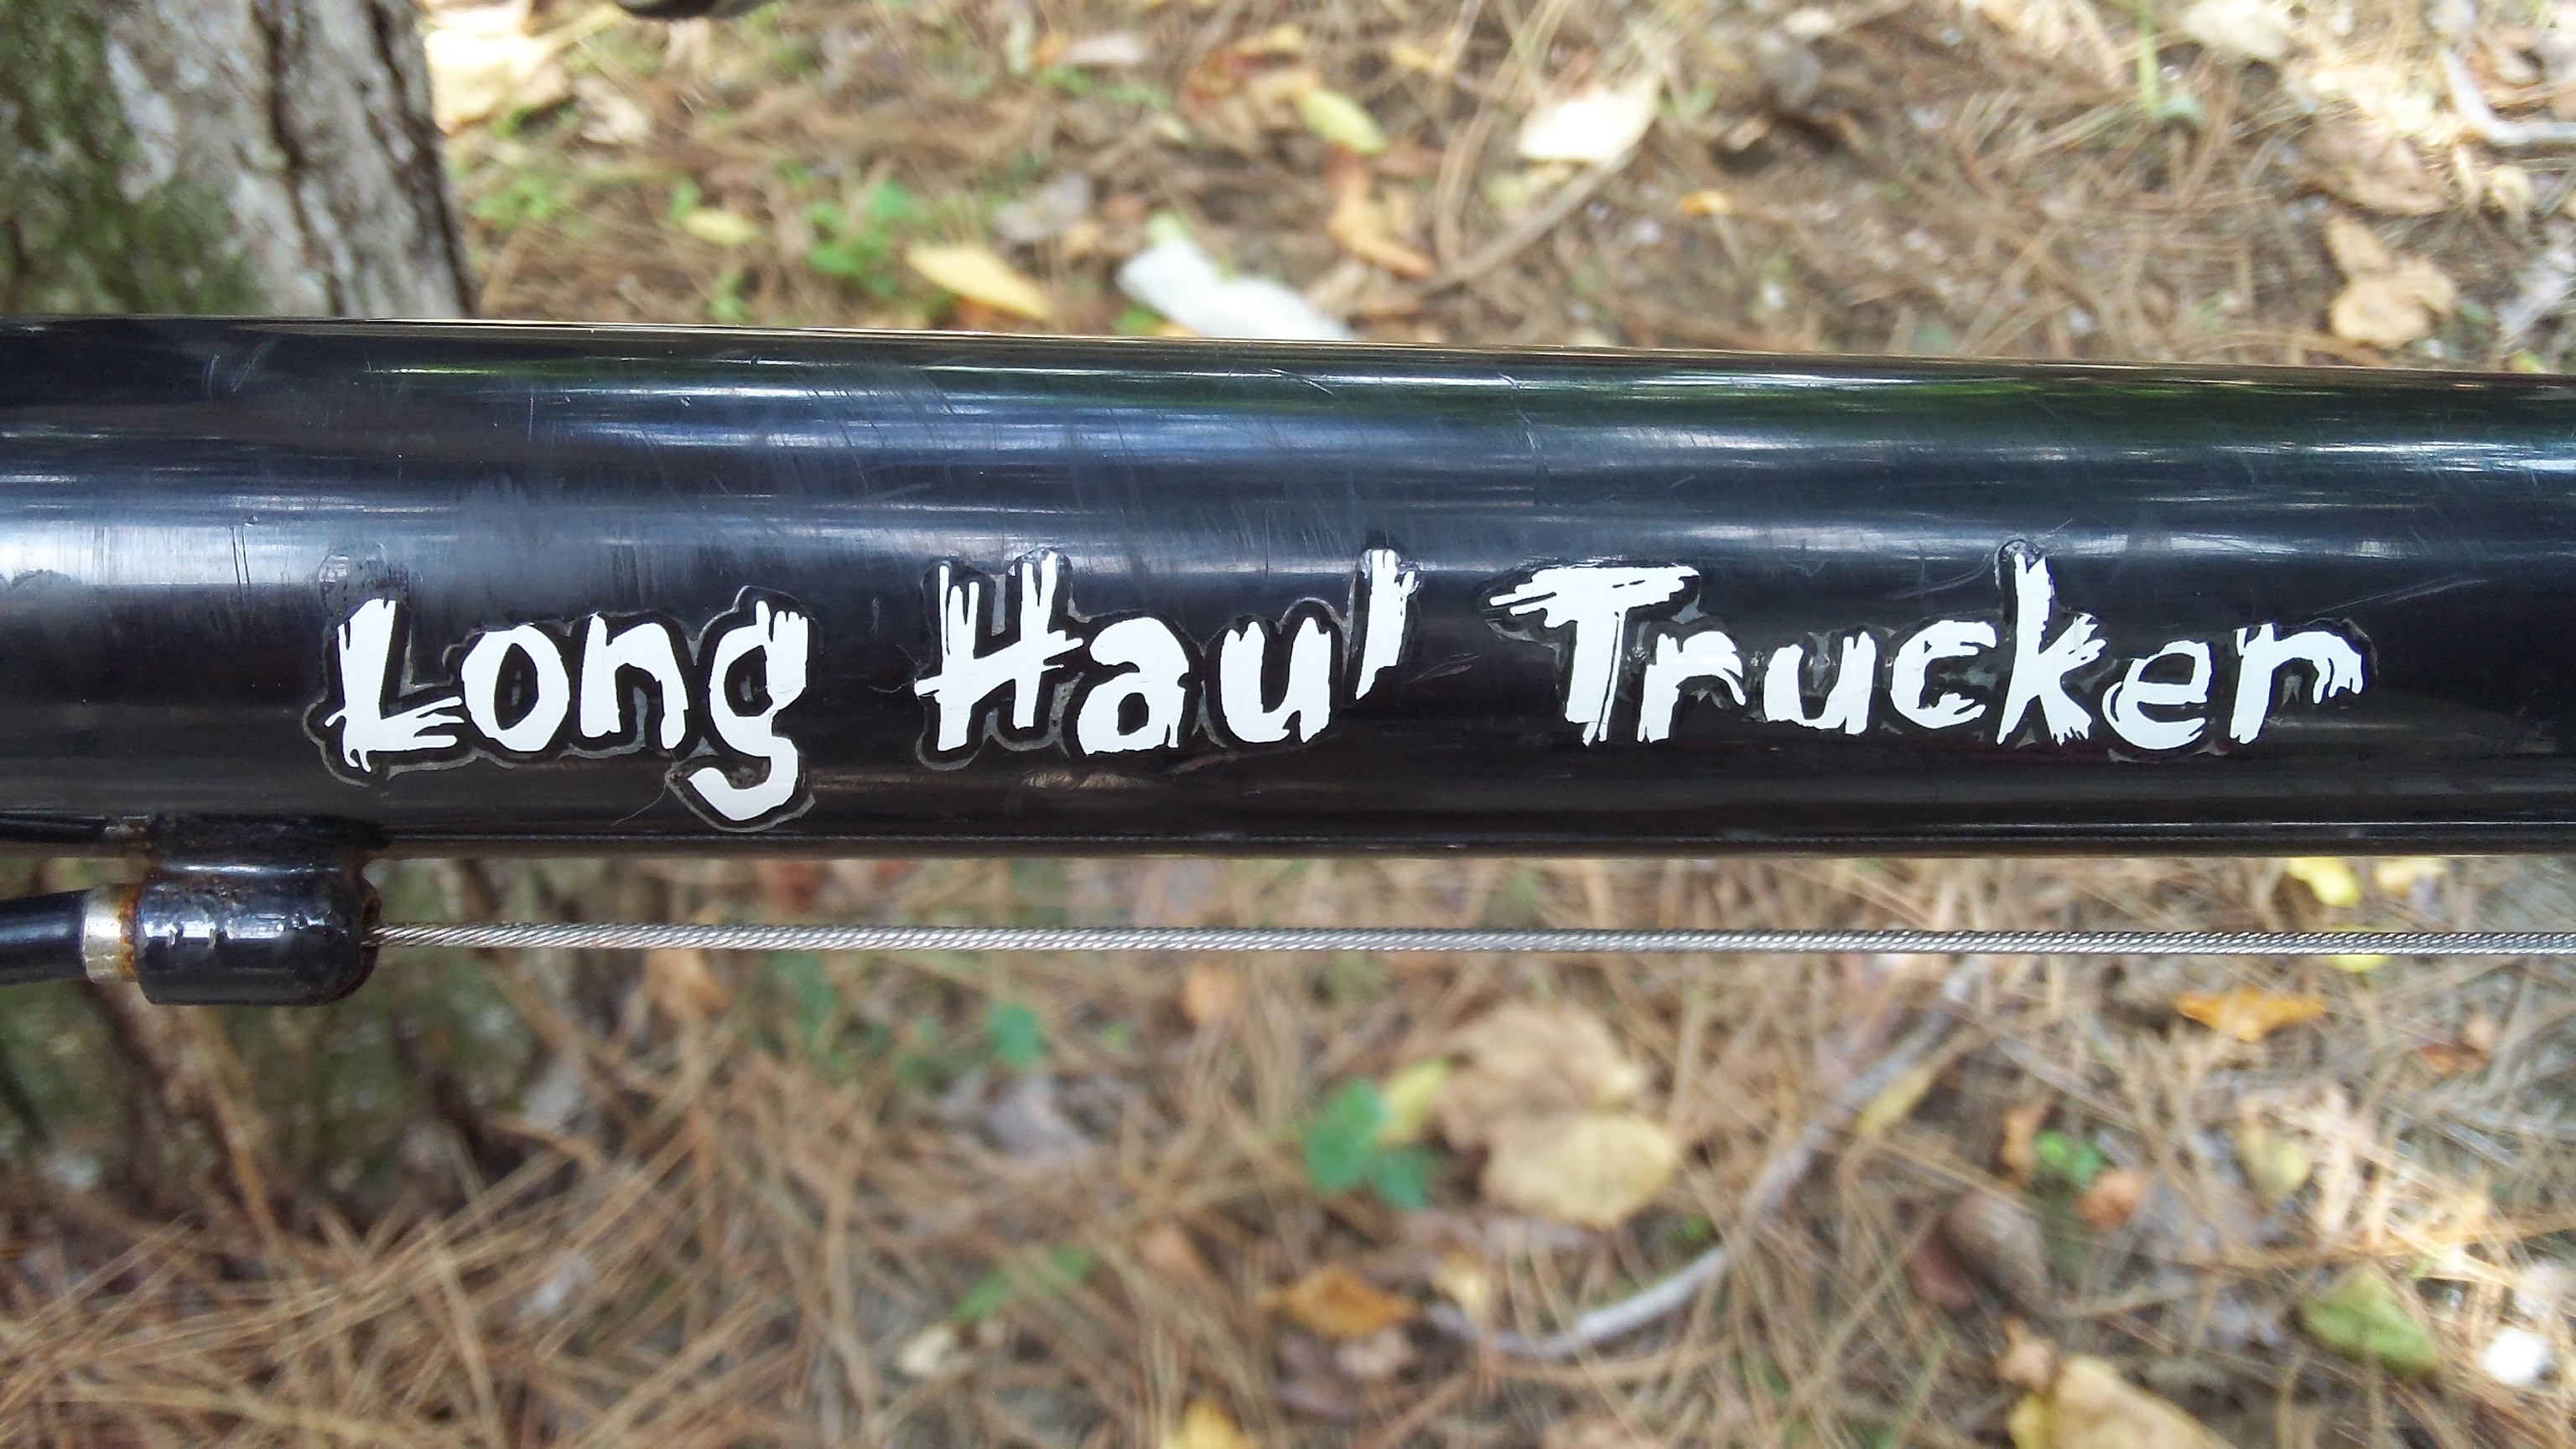
The Bicycles: Surly Long Haul Truckers
Status: Going strong
Recommendation: YES!
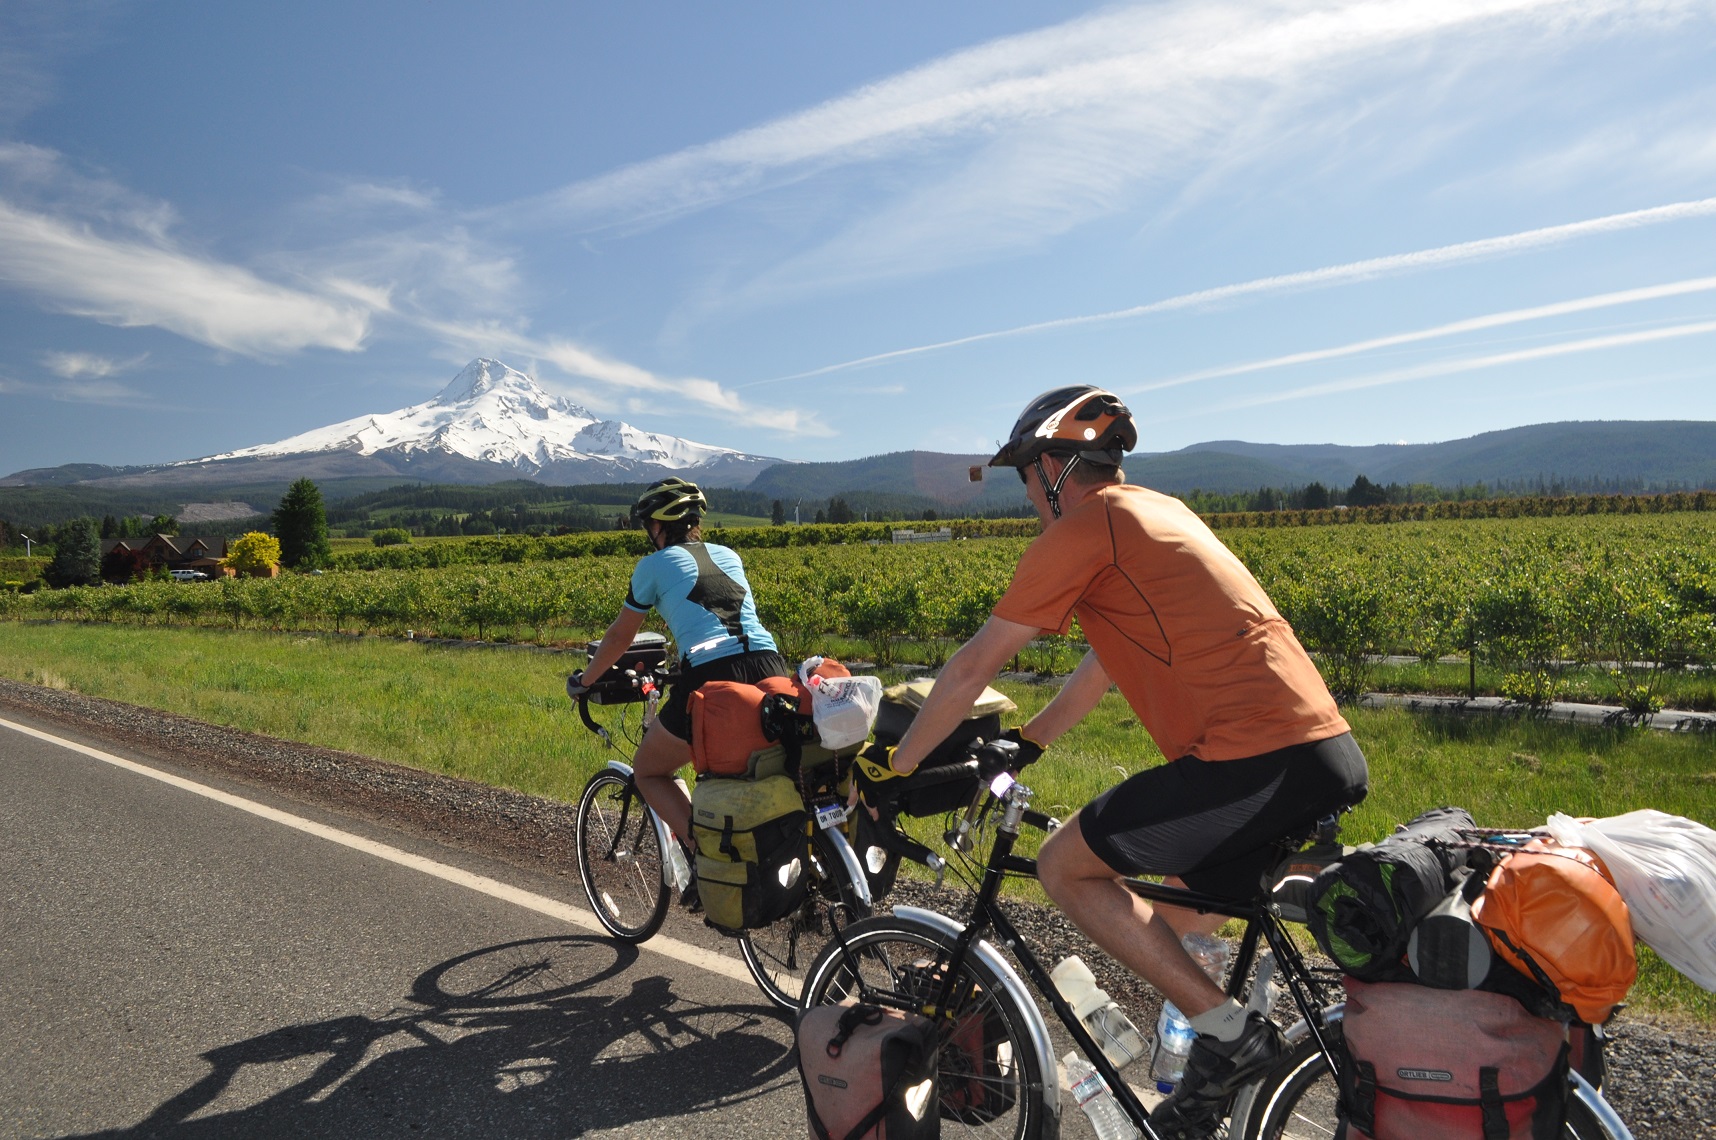
We’ve had several people ask us how many bikes we went through to complete our 22,900-mile journey. The answer is simple: we started and finished on the same bikes. And we put our bikes through a lot—loading them up with a hefty supply of camping gear, riding them over unbearably bumpy roads in Patagonia, dragging them out into the sand several times so we could camp on the beach, disassembling and packing them up in boxes to be tossed about by the luggage handlers of seven different airlines… you get the idea. It’s not like the Tour was easy for us, but it was definitely hard on our bikes! Ultimately, they survived and finished well. And we’re still riding them around regularly, without having done any major work on them since we got home.
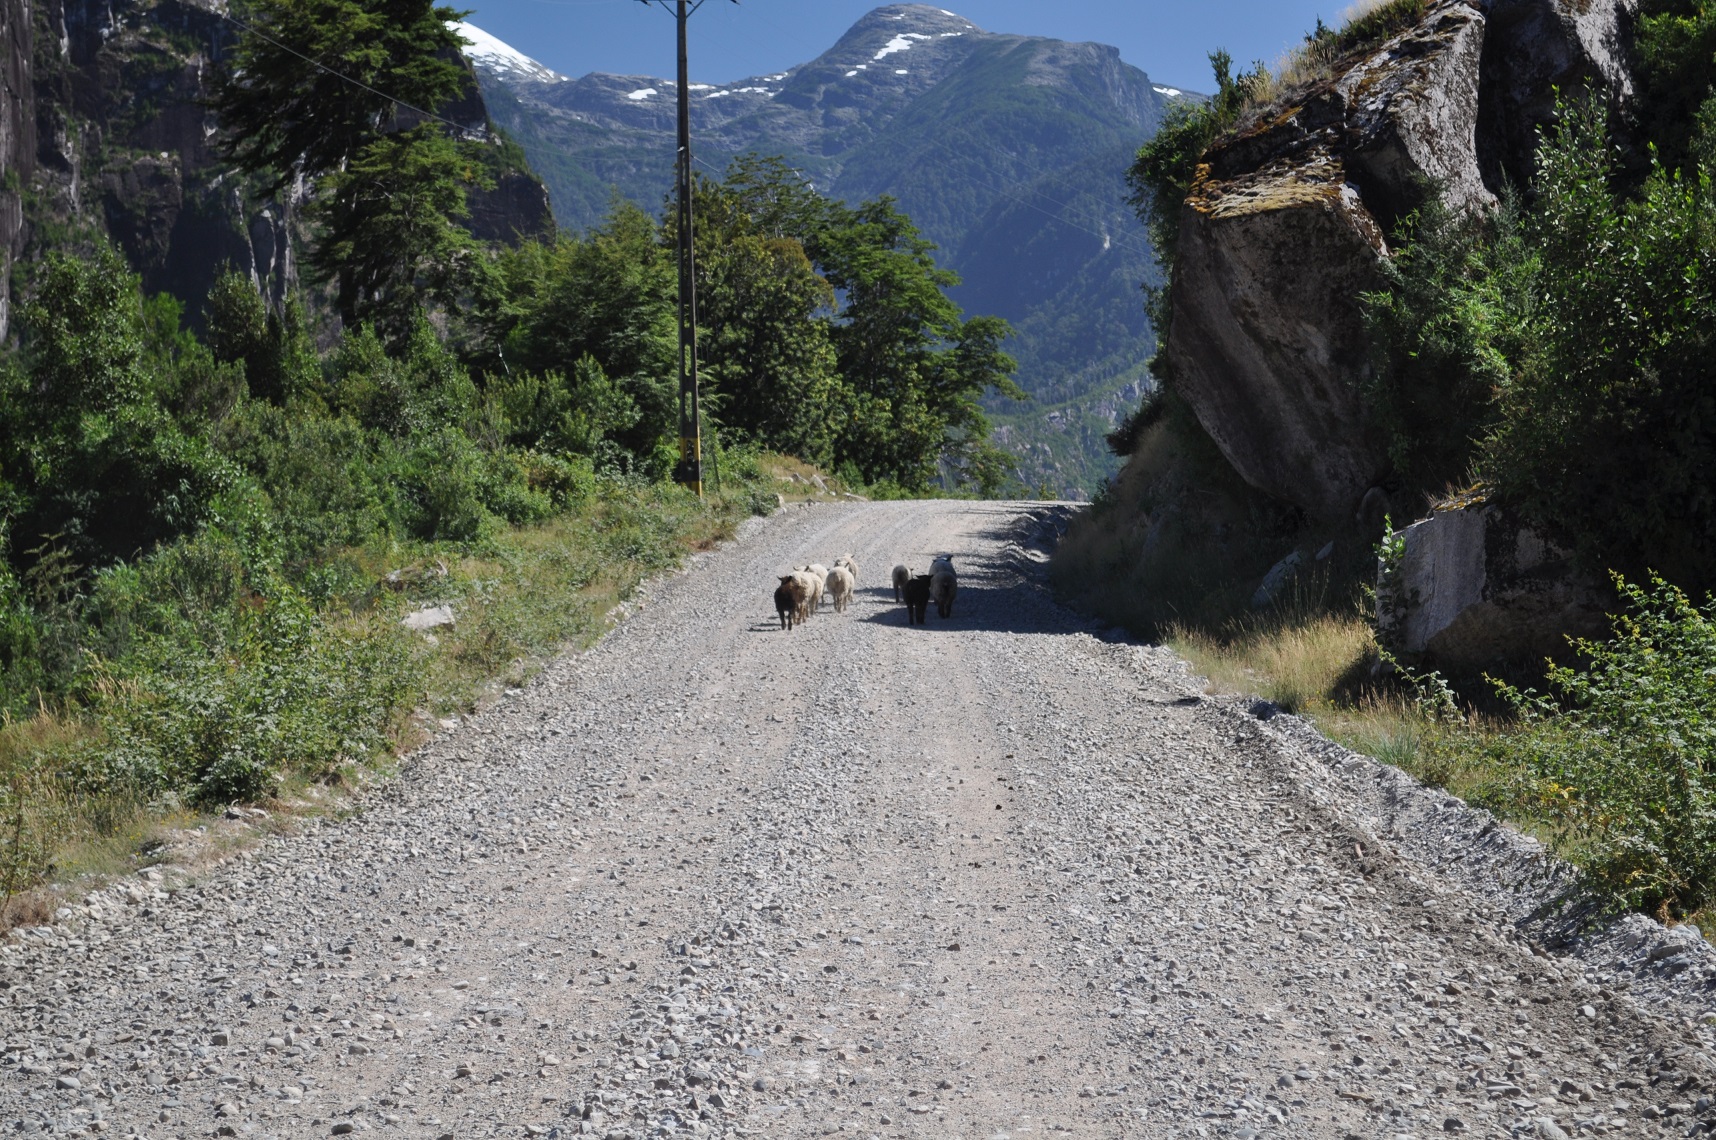
Bumpy gravel roads like this one in Chile didn’t exactly help our bikes! (And those are goats just down the way, in case you’re wondering.)
Now, don’t be mistaken—we replaced lots of components along the way, which was normal and expected. We finished the ride on the sixth chain on each of our bikes. Dave replaced the cassettes and chain rings at the 14-month mark of our trip (roughly 13,000 miles/21,060 kilometers). I went through three sets of handlebar tape and Dave started and finished with the original that came on the bike. (Apparently I’m harder on that stuff than he is… or perhaps I just dropped my bike more often and it eventually tore up some spots on the bar tape.) We didn’t keep track of how many brake pads we burned our way through. It was a lot.
But the bikes themselves, though some paint chipped and the Surly label wore off, held up wonderfully. The only corrosion (rust) that we noticed was on the headset, and even that was minor considering these bikes stayed outside in many a downpour.
At the one-year mark, when this photo was taken, the labels were starting to chip away. Now they are completely gone.
Tires: Schwalbe Marathon
Status: Seen better days
Recommendation: YES
Well, to state the obvious, we did not finish the Tour with the same tires that were on our bikes when we departed. We took off on the tires that came stock on the bike, which punctured easily and wore out quickly. As we researched how we could improve our tire choice, we found more and more reviews from experienced touring cyclists who recommended Schwalbe Marathon tires. Once we made the switch, we were hooked. Our puncture occurrences went from frequent to rare, and our first set of Schwalbes lasted us 10,000 miles (16,000 kilometers). We are still using our second set of Marathon tires, which we put on our bikes in December 2012 when we transitioned from Europe to Asia. Though they are heavily worn, we rarely get punctures, and we will continue to use them until they die completely. They currently have about 8,000 miles (13,000 kilometers) on them.
Rims: Various brands
Status: Seen better days
Recommendation: NO
We’ve mentioned this on the blog before, but we wore through more rims than we anticipated on our Tour. We had one of the more renowned brands (Mavic) wear out in less than a year, while a no-name brand (Outback) rim we put on Dave’s bike in Argentina (two years ago), is still trucking along just fine. So they’re not necessarily predictable. The main issue with our rims was actually our brakes (see next section).
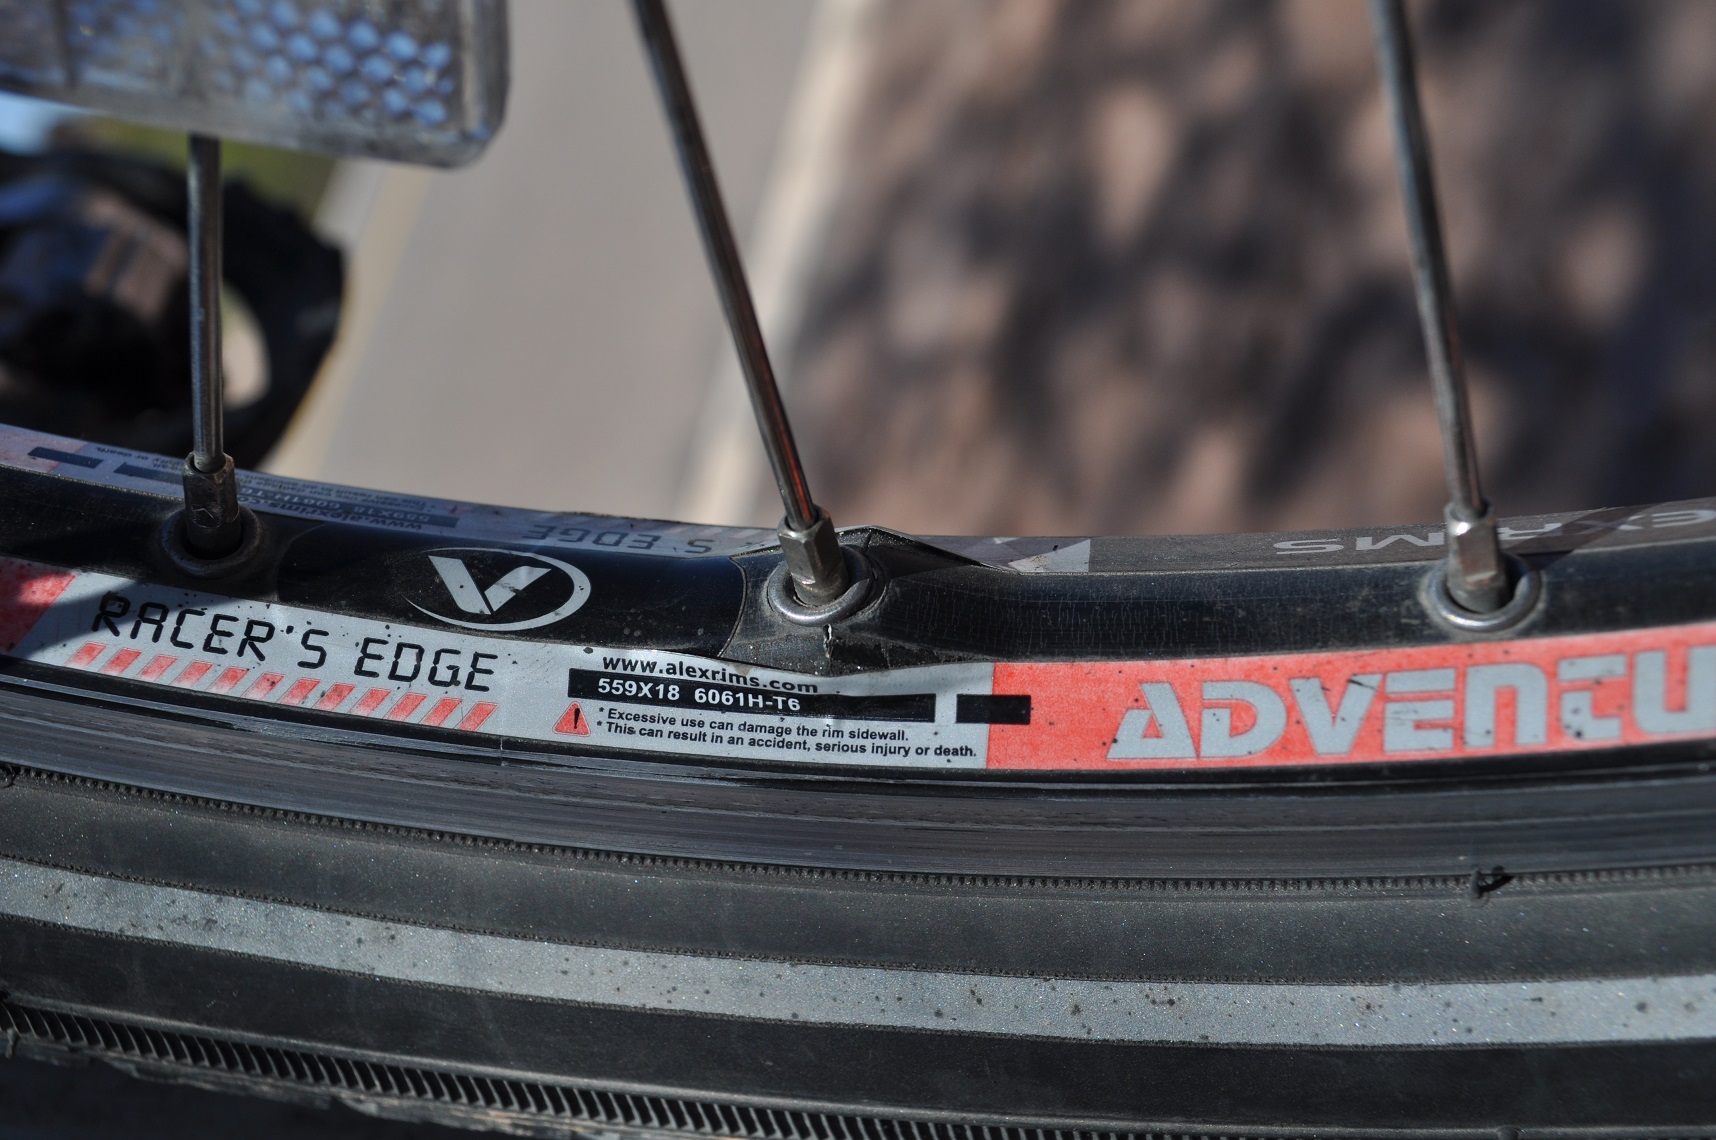
The perfect irony of this rim failure was that the spoke pulled through, cracking the sticker that warned “Excessive use can damage the rim sidewall. This can result in an accident, serious injury, or death.” Wow.
Altogether, I’d say it’s worth paying a little extra for a more stout rim, and we might even recommend the version our friend Steve of Cycling the 6 has used with great satisfaction. They are made of tungsten carbide and his first set lasted him 33,000+ kilometers… and I can assure you he’s traveled many a rough dirt road in that distance. Click here to read his most recent kit review, including details about his rims.
Brakes: Tektro CR720
Status: Going strong
Recommendation: Depends
To follow up on what we mentioned above, we had rim brakes on our bikes, to which we attribute our many rim failures throughout the Tour. The brakes we have are Tektro CR720s, which are actually an upgrade from the ones that come stock on the Surly bike. We knew this style provided more leverage, and therefore more stopping power, which is useful in the mountains, especially with all our gear. What we did not take into account was how quickly that added braking force would wear down our rims. So we would give two options to someone planning a bike tour, and encourage you in one direction or the other as far as deciding which combination of brakes and rims to use. Option one: use rim brakes like we did (we were satisfied with them and found that it was easy to find replacement brake pads since any generic cantilever-style brake pad will work) and purchase a set of tungsten carbide rims. Option two: Keep the basic rims and purchase a bike with disc brakes (Surly makes a Disc Trucker!). The disc brake option also provides more stopping power in the rain, which is an obvious bonus. Disc brakes require less squeeze force to operate as well, so there is less fatigue when riding down steep grades while fully loaded. But you should know disc brakes are not as common in the developing world, and will likely prove to be more challenging when it comes to spare parts. Either way, we recommend carrying some replacement parts with you so you can repair your own brakes when they wear out, which they will, no matter what you get.
Learn from us! The basic rims and rim brake combination is not downright terrible, and we always managed to muddle through when we had rim problems. But I think you’ll find these other options offer lower risk of gear failures and hassle.

The less-than-ideal location for a rim failure–on a desolate stretch of desert road in Argentina. This was literally the only shade we saw for miles, and it was four days before we found a town big enough to have a bike shop that could replace the rim.
As an aside, we reused the same spokes and hubs that came with the bikes (we didn’t break a single spoke on our trip!) when we replaced the rims on our bikes. However, we replaced any nipples that were showing wear – ask whoever is building the rim about this part. At home it is generally recommended to replace the spokes when the rim is replaced. However, we felt the spokes that we had were better, even in their worn state, than what we would be able to find in the developing world.
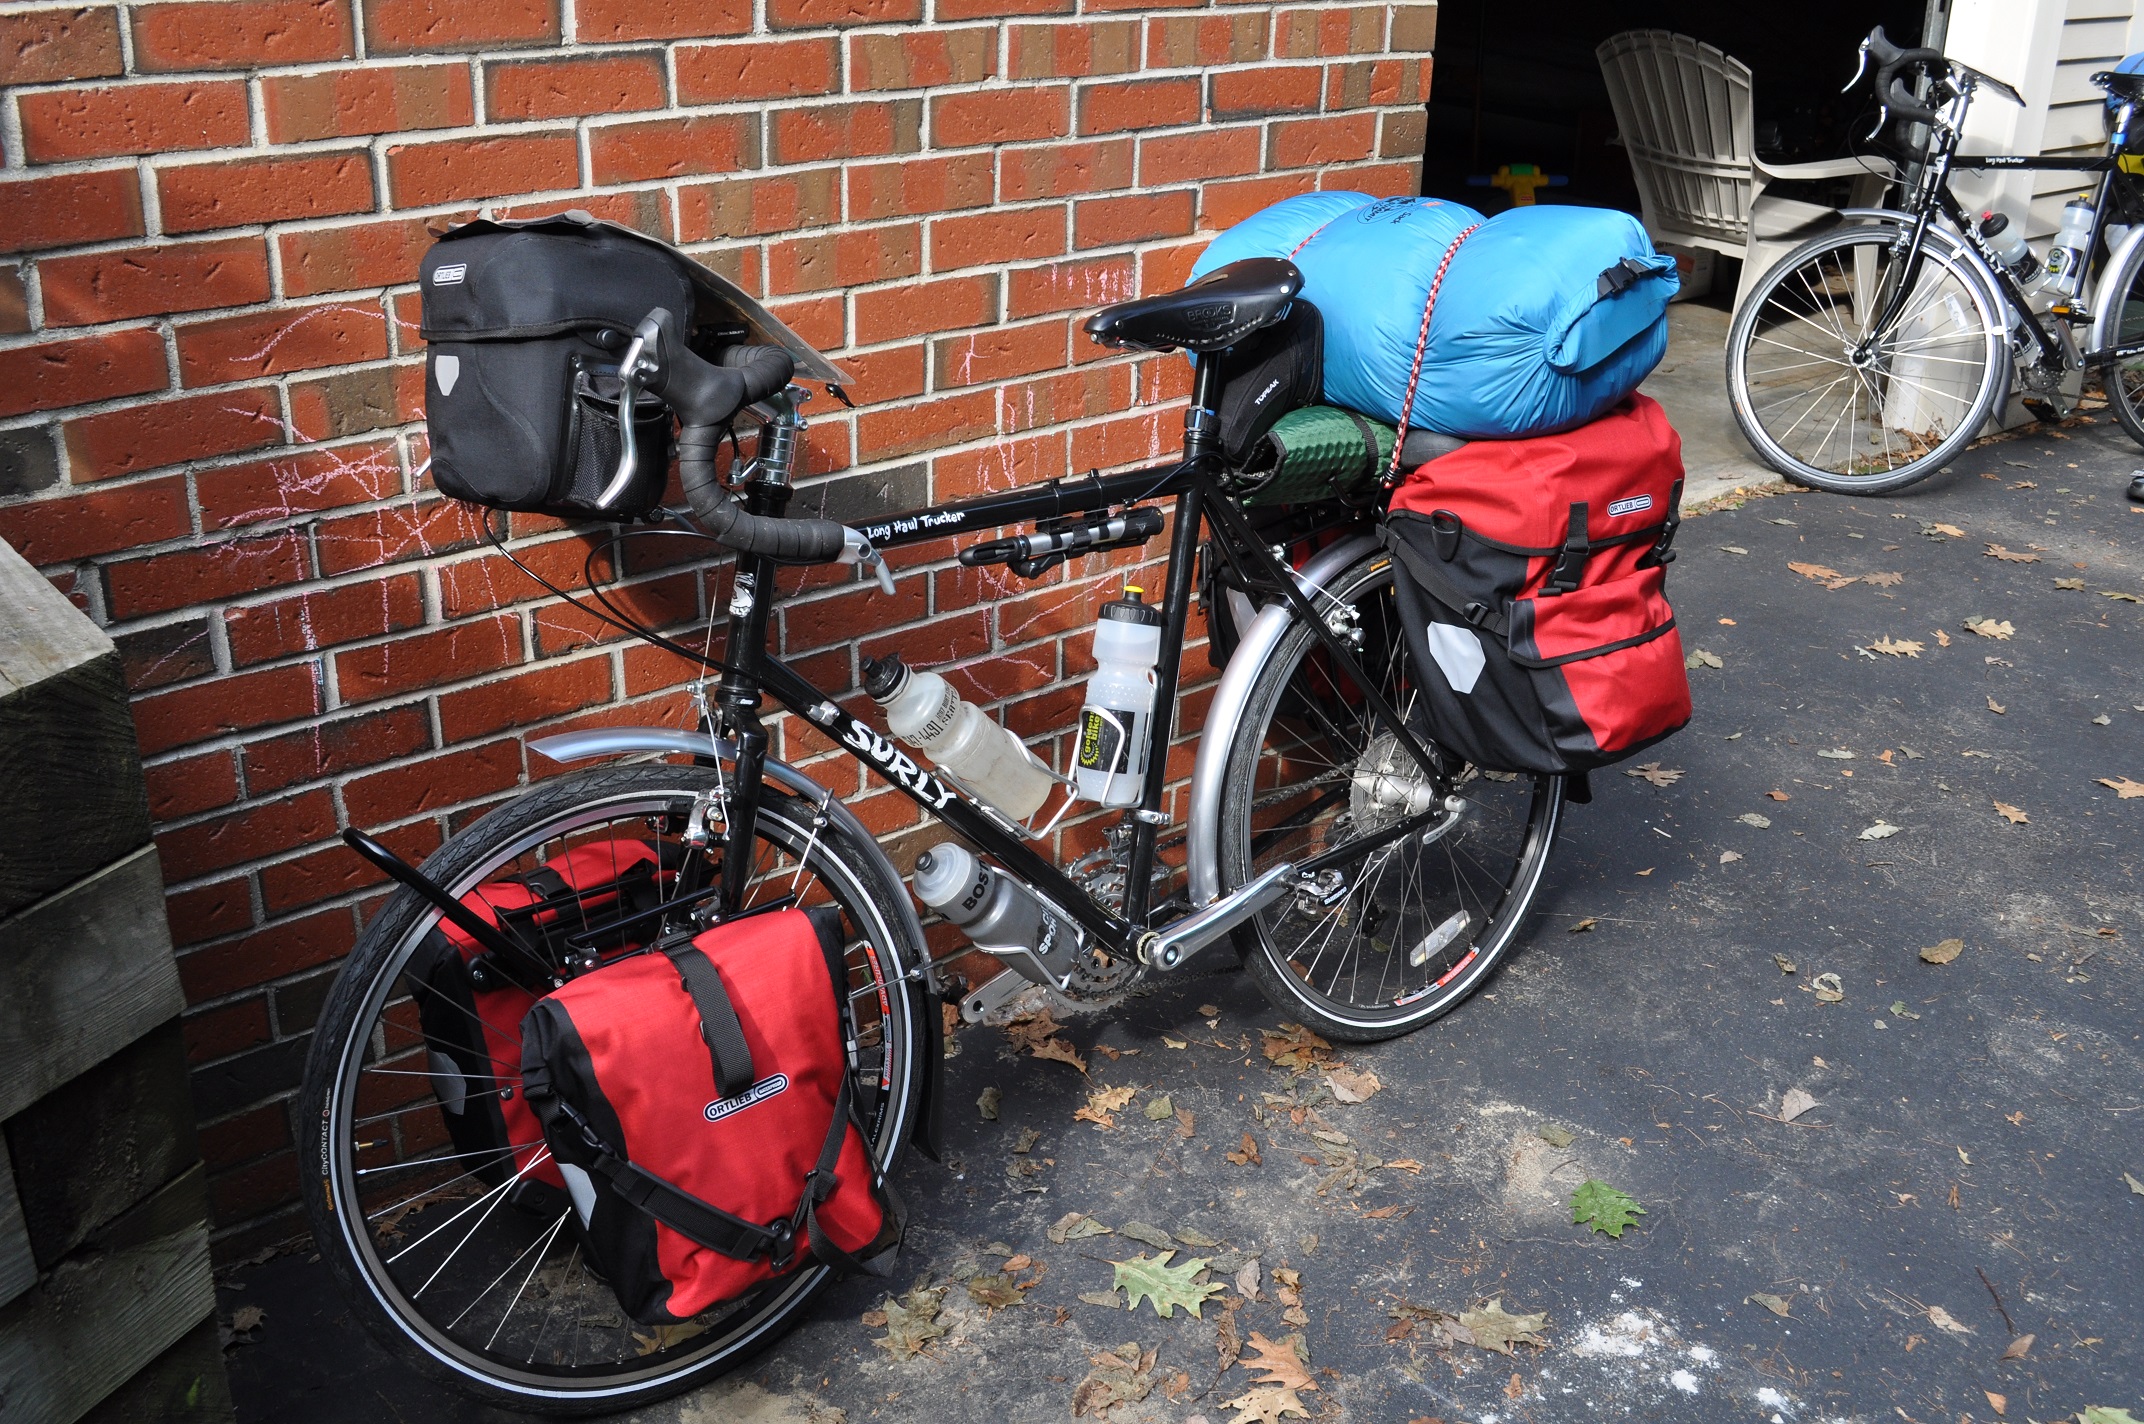
Racks: Tubus Cargo Rear Racks (both) and Tara Low-Rider Front Rack (for Dave)
Status: Going strong
Recommendation: YES
The majority of people we met on long bike tours had this same brand racks, if not the exact same rack, as us. They are known to be the toughest and sturdiest out there. And we can’t object. These racks survived the whole trip, with only one small issue on my rear rack. On a particularly bumpy section one of the screws used to attach my rack to the bike fell off. We installed a replacement screw (which we carried with us) and continued on without incident. We also put some protective coverings on our racks (more on that in a future post) to help them hold up longer… and it worked. These racks not only finished the ride, but are in excellent condition. I would set out on an equally long tour with the same racks without any hesitation.
Panniers: Ortlieb Bike Packer Plus (for both) and Front Roller Plus (for Dave)
Status: Seen better days
Recommendation: YES
Ortlieb Waterproof bags are the standard for long bike tours—end of story. Our bags remained fully waterproof for about 90 percent of our journey. They are still mostly waterproof, and we continue to use them for errands around town and trips to the grocery store. I would not hesitate to use them for another short bike tour. However, toward the end of our journey, if we got a true downpour, we would usually find some moisture in our bags. We never pulled anything out sopping wet, but many items would have a general dampness about them. Fortunately, we also put most of our stuff in dry sacks even inside the Ortlieb bags, so for us, it wasn’t a big deal. Ultimately, we think it was UV damage that pushed our panniers over the edge. The bags’ color began fading significantly about six months into our journey, and we spent a large amount of time in the Tropics where the sun’s strength gradually wore down the protective coating.
A picture of Dave’s bike and bright red panniers on the day we left.

An up-close look at the faded red it became by the journey’s end. Well-used and loved, our Ortlieb panniers went the distance.
One more great shot where you can see the significant color distance. Dave’s panniers were basically pink by the time we got back to the US.
If you’re planning a trip longer than ours, I would still recommend the Ortliebs. There is, to my knowledge, no better option. Plus, Ortlieb bags come with a five-year warranty, and we’ve heard if they fail to remain waterproof, you can have them replaced at no charge (But hey, we haven’t tried! Check out their web site here for more info!
So that’s it for our first round of gear reviews. Next week we’ll be digging into the details of our camping gear and how it fared. Don’t miss it!